Click on the Criteria tab.
Select a report profile from the drop-down list.
Click the Save As button, and enter the name of your alert.
ALERT NAMING TIP: We suggest that you append "Alert:" to the beginning of the profile name. For example, if you want to create an alert for your 21-day data source report, then you would save the associated alert as, "Alert: 21D All Compset Up 5%". That way you can distinguish the "alert" copy from the profile you use for reporting.
In the Subscribe to an Alert section, click the Subscribe button.

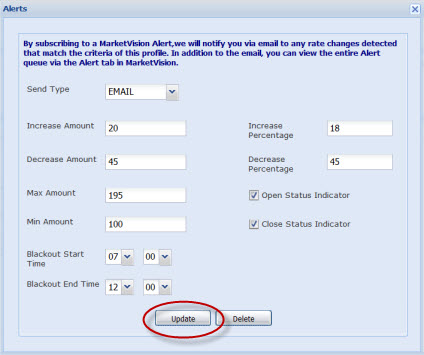
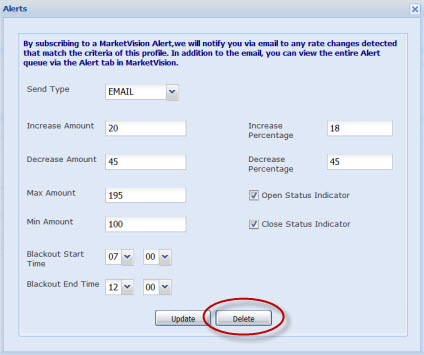
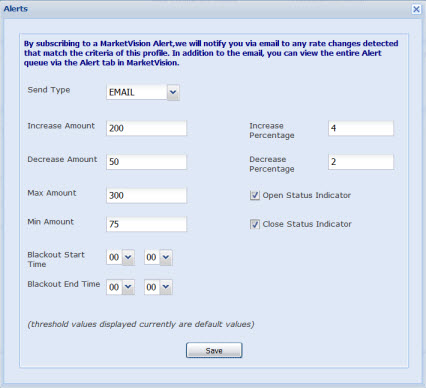
In the Alerts pop-up window, complete the fields as appropriate (see the table below for field descriptions), and then click Save.
|
|
|
|
Description |
|
|
Send Type |
Indicates your preferred method for receiving alert notifications. Currently, email is the only option available. Additional options will be available in the near future. |
|
Increase Amount |
The threshold for increases in a shopped rate since the last shop, based on the profile currency. For example, if a competitor shopped rate goes from $150 to $175, and this field is set to $20, an alert event will be triggered and you will receive an email notification. |
|
Increase Percentage |
The threshold for a percentage increase in a shopped rate since the last shop, based on the profile currency. For example, if a competitor shopped rate goes from $100 to $120 and this field is set to 18 (%), an alert event will be triggered and you will receive an email notification. |
|
Decrease Amount |
The threshold for decreases in shopped rate since the last shop, based on the profile currency. For example, if a competitor's shopped rate goes from $175 to $125 and this is set to $45, then an alert event will be triggered and you will receive an email notification. |
|
Decrease Percentage |
The threshold for decrease percent in shopped rate since the last shop, based on the profile currency. For example, if a competitor shopped rate goes from $100 to $50 and this field is set to 45 (%), then an alert event will be triggered and you will receive an email notification. |
|
Max Amount |
The threshold for the highest shopped rate, based on profile currency. For example, if a competitor shopped rate is 200EUR and this field is set to 195EUR, an alert event will be triggered. |
|
Min Amount |
The threshold for the lowest shopped rate, based on profile currency. For example, if a competitor shopped rate is 90EUR and this field is set to 100EUR, then an alert event will be triggered and you will receive an email notification. |
|
Open Status Indicator check box |
Triggers an alert if the shopped rate goes from a closed rate the last time it was shopped to an open status. |
|
Close Status Indicator check box |
Triggers an alert if the shopped rate goes from an open rate the last time it was shopped to a closed status. |
|
Blackout Start Time |
Prevents alert messages from being sent after this time (in Eastern Standard Time). Note that alert events will still display on the Alerts tab. |
|
Blackout End Time |
Indicates the time alert messages can resume (in Eastern Standard Time) if they were halted at the time specified in the Blackout Start time option (see above). |
(Optional) On the Criteria page, disable scheduled shopping options, if applicable.